Kotlin Multiplatform for sharing code between native Android and iOS app

Often we mobile developers get asked a question, “Can we share code between Android and iOS app?”. After all much of the business logic remains the same regardless of platform we build for. Mobile developers ends up implementing much of exact same logic on each platform. Not only logic but, tests around that code is also duplicated. It is also challenging to ensure both apps implemented exact same logic. After all, if different developers worked on the platform, chances are logic is different causing each app to behave differently.

In this post, I will go over Kotlin Multiplatform as a solution for this problem. I will explain how Kotlin Multiplatform could help us having “common” code in one place shared between the two native apps. One of the main objective is that common code should be native to each platform and should have first class citizen support.

Problem Statement:

As an example for this use case, let’s assume that we are trying to implement an Analytics Event Logging framework. To keep things simple, let’s say the event name and property should be same on both platforms. An Event is a “common” thing for each platform. (Note: the issue could have been that each platform may have named their Event and property different, “button_click” vs “ButtonClick” etc)

In this example we will build a Kotlin Multiplatform solution that contains the common code shared between in Android and iOS app.

Settings up Android Project:

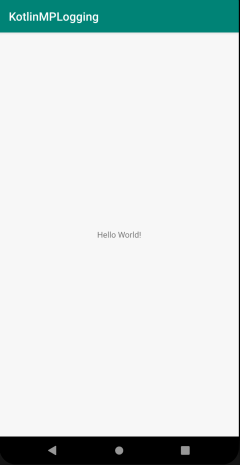
Let’s being by setting up a new Android project. Go through the new project wizard in the Android Studio and create a new Android project called “KotlinMPLogging”. Once complete, you should be able to start the app and see the “Hello World!” screen.

1. Hello World

Switching to Kotlin 1.3:

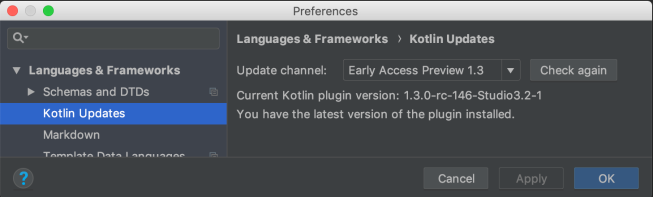
At this point, let’s configure our project to use Kotlin 1.3, Let’s configure our IDE to use the Kotlin 1.3 plugin. To do so, go to the Settings, Cmd + , > Languages & Frameworks > Kotlin Updates and pick “Early Access Preview 1.3”

Screen Shot 2018-10-14 at 12.57.31 PM

Next up, let’s update the build.gradle, of the main Project and update the kotlin version (rc-80 is the latest RC version as of this writing)

ext.kotlin_version = '1.3.0-rc-80'

Your, IDE will error out as it will not able to obtain the pre-release version of kotlin. To fix this, we would need to add maven url in the build script.

maven { url 'https://dl.bintray.com/kotlin/kotlin-eap' }

We will add this for both buildscript as well as allprojects so our app module is able to get the right version of std lib.

After these changes are made, your build.gradle should look like this:

buildscript {
ext.kotlin_version = '1.3.0-rc-80'
repositories {
google()
jcenter()
maven { url 'https://dl.bintray.com/kotlin/kotlin-eap' }
}
dependencies {
classpath 'com.android.tools.build:gradle:3.2.1'
classpath "org.jetbrains.kotlin:kotlin-gradle-plugin:$kotlin_version"
}
}
allprojects {
repositories {
google()
jcenter()
maven { url 'https://dl.bintray.com/kotlin/kotlin-eap' }
}
}
view raw build.gradle hosted with ❤ by GitHub

We should also update the gradle wrapper to 4.10+ as Kotlin Native plugin requires the newer version. To do so update distrubtionUrl in gradle-wrapper.properties file

distributionUrl=https\://services.gradle.org/distributions/gradle-4.10.2-all.zip


At this point, you should be able to successfully build and run the Android project. Nothing has changed so far expect for using Kotlin 1.3.

Setting up the “Common” Kotlin Multiplatform module:

Now the interesting part. It’s time to build the Kotlin Multiplatform portion. This will be shared between different platforms (iOS and Android). To keep things simple, let’s create a folder named common in current project folder.

The folder will be structured in following way:

common/src/commonMain: All the common code will be here

common/src/androidMain: Android specific code would live here, for this example we won’t have anything here.

common/src/iosMain: iOS specific code would live here, for this example we won’t have anything here.

Time to create build.gradle for this module (it will be inside “common” folder we created above).

apply plugin: 'kotlin-multiplatform'
kotlin {
targets {
final def iOSTarget = System.getenv('SDK_NAME')?.startsWith("iphoneos") \
? presets.iosArm64 : presets.iosX64
fromPreset(iOSTarget, 'iOS') {
compilations.main.outputKinds('FRAMEWORK')
}
fromPreset(presets.jvm, 'android')
}
sourceSets {
commonMain.dependencies {
api 'org.jetbrains.kotlin:kotlin-stdlib-common'
}
androidMain.dependencies {
api 'org.jetbrains.kotlin:kotlin-stdlib'
}
}
}
// workaround for https://youtrack.jetbrains.com/issue/KT-27170
configurations {
compileClasspath
}
view raw build.gradle hosted with ❤ by GitHub

Here, we apply the ‘kotlin-multiplatform‘ plugin. Source set dependencies are defined here. e.g. we use kotlin-std-common in our common source set.

In the commonMain, start by creating the Event interface (commonMain/kotlin/com/manijshrestha/kotlinmplogging/analytics).

package com.manijshrestha.kotlinmplogging.analytics
interface Event {
fun eventName(): String
fun eventProperties(): Map<String, String>?
}
view raw Event.kt hosted with ❤ by GitHub

To limit the complexity in this example, let’s create a AnalyticsManager interface. Idea is that Event gets reported by AnalyticsManager. Each platform will implement its own Manager and use the Event from the common code.

package com.manijshrestha.kotlinmplogging.analytics
interface AnalyticsManager {
fun report(event: Event)
}

With this plumbing in place, we can now add real Event implementations. We will add 2 events.

ButtonClickEvent and ViewEvent 

package com.manijshrestha.kotlinmplogging.analytics
data class ButtonClickEvent(private val buttonName: String) : Event {
override fun eventName() = "Button_Clicked"
override fun eventProperties() = mapOf(
"button_name" to buttonName
)
}
package com.manijshrestha.kotlinmplogging.analytics
data class ViewEvent(private val pageName: String) : Event {
override fun eventName() = "Page_Viewed"
override fun eventProperties() = mapOf(
"page_name" to pageName
)
}
view raw ViewEvent.kt hosted with ❤ by GitHub

As you can see above, each of the class have event name defined, regardless of the platform (iOS or Android) these events will have same name. Also required parameters are defined in the class so each platform will need to provide those arguments.

We could do lot more here but to keep the scope of this post limited to common code, We will leave this here and move on to platform specific implementation.

Using Common in Android Project:

Now it’s time to utilize the common code in our Android project. To do so lets include the “common” module in settings.gradle file

include ':common'

Now, add “common” project as a dependency in our app’s build.gradle dependencies section.

implementation project(':common')

With above changes, we can now provide the implementation of the AnalyticsManager. We could implement it to send Fabric Answers event or Google Analytics or perhaps to any services that you may want to call. For now, we are going to log the event in logcat using android logger.

package com.manijshrestha.kotlinmplogging
import android.util.Log
import com.manijshrestha.kotlinmplogging.analytics.AnalyticsManager
import com.manijshrestha.kotlinmplogging.analytics.Event
class AndroidAnalyticsManager : AnalyticsManager {
override fun report(event: Event) {
Log.d("AAM", "Interaction ${event.eventName()} happened with property ${event.eventProperties()}")
}
}

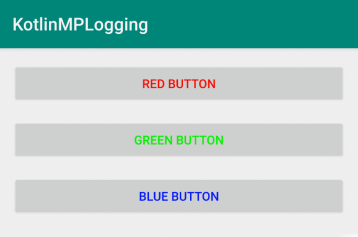
To see it in action, we are going to update the activity layout to have three buttons. We will send separate event on each button click.

<?xml version="1.0" encoding="utf-8"?>
<android.support.constraint.ConstraintLayout
xmlns:android="http://schemas.android.com/apk/res/android&quot;
xmlns:tools="http://schemas.android.com/tools&quot;
xmlns:app="http://schemas.android.com/apk/res-auto&quot;
android:layout_width="match_parent"
android:layout_height="match_parent"
tools:context=".MainActivity">
<Button android:id="@+id/red_button"
android:layout_width="0dp"
android:layout_height="wrap_content"
android:text="@string/red_button"
android:layout_margin="16dp"
android:textColor="#FF0000"
android:onClick="onButtonClick"
app:layout_constraintLeft_toLeftOf="parent"
app:layout_constraintRight_toRightOf="parent"
app:layout_constraintTop_toTopOf="parent"/>
<Button android:id="@+id/green_button"
android:layout_width="0dp"
android:layout_height="wrap_content"
android:text="@string/green_button"
android:layout_margin="16dp"
android:textColor="#00FF00"
android:onClick="onButtonClick"
app:layout_constraintLeft_toLeftOf="parent"
app:layout_constraintRight_toRightOf="parent"
app:layout_constraintTop_toBottomOf="@+id/red_button"/>
<Button android:id="@+id/blue_button"
android:layout_width="0dp"
android:layout_height="wrap_content"
android:text="@string/blue_button"
android:layout_margin="16dp"
android:textColor="#0000FF"
android:onClick="onButtonClick"
app:layout_constraintLeft_toLeftOf="parent"
app:layout_constraintRight_toRightOf="parent"
app:layout_constraintTop_toBottomOf="@+id/green_button"/>
</android.support.constraint.ConstraintLayout>

Here is the Activity where we will implement the reporting of the event.

package com.manijshrestha.kotlinmplogging
import android.os.Bundle
import android.support.v7.app.AppCompatActivity
import android.view.View
import com.manijshrestha.kotlinmplogging.analytics.ButtonClickEvent
import com.manijshrestha.kotlinmplogging.analytics.ViewEvent
class MainActivity : AppCompatActivity() {
private val analyticsManager = AndroidAnalyticsManager()
override fun onCreate(savedInstanceState: Bundle?) {
super.onCreate(savedInstanceState)
setContentView(R.layout.activity_main)
}
override fun onResume() {
super.onResume()
analyticsManager.report(ViewEvent("Main Page"))
}
fun onButtonClick(view: View) {
when (view.id) {
R.id.red_button -> analyticsManager.report(ButtonClickEvent("Red"))
R.id.green_button -> analyticsManager.report(ButtonClickEvent("Green"))
R.id.blue_button -> analyticsManager.report(ButtonClickEvent("Blue"))
}
}
}
view raw MainActivity.kt hosted with ❤ by GitHub

With these changes we can run the app and see it in action.

Screen Shot 2018-10-14 at 3.21.38 PM

Screen Shot 2018-10-14 at 3.22.04 PM

When the page is loaded, we are now reporting Page_Viewed event with the page name and as we tap on each button, we get Button_Clicked events reported (above, we can see Red and Green button click events).

With android side fully implemented, it is time to implement it in the iOS app.

Building common framework for iOS:

If you take a peek at the “common/build” folder, you can see that it generated the java class files for our Android app to consume. For iOS app we need to compile it as “framework“. Let’s get this by adding the following script in our build.gradle file of common module.

task packForXCode(type: Sync) {
final File frameworkDir = new File(buildDir, "xcode-frameworks")
final String mode = System.getenv('CONFIGURATION')?.toUpperCase() ?: 'DEBUG'
inputs.property "mode", mode
dependsOn kotlin.targets.iOS.compilations.main.linkTaskName("FRAMEWORK", mode)
from { kotlin.targets.iOS.compilations.main.getBinary("FRAMEWORK", mode).parentFile }
into frameworkDir
doLast {
new File(frameworkDir, 'gradlew').with {
text = "#!/bin/bash\nexport 'JAVA_HOME=${System.getProperty("java.home")}'\ncd '${rootProject.rootDir}'\n./gradlew \$@\n"
setExecutable(true)
}
}
}
tasks.build.dependsOn packForXCode
view raw build.gradle hosted with ❤ by GitHub

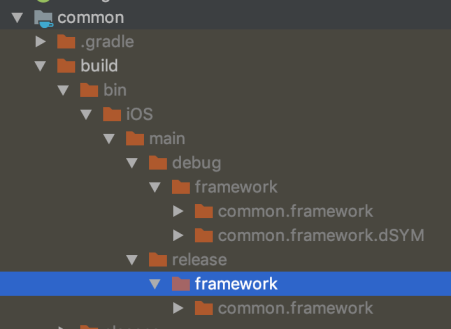
With following changes in place, run the ​’​build’ task.

Screen Shot 2018-10-14 at 3.30.34 PM

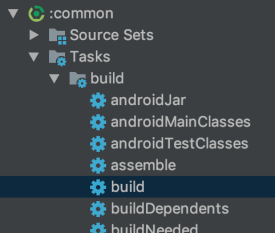
We should see the frameworks being generated for both release and debug.

Screen Shot 2018-10-14 at 3.31.29 PM

Setting up iOS project:

Go through the new project setup wizard on Xcode and create a single view application.

Now, add the framework that was build from above step in our project. To do this, go to General > Embedded Binaries +

Screen Shot 2018-10-14 at 4.31.59 PM

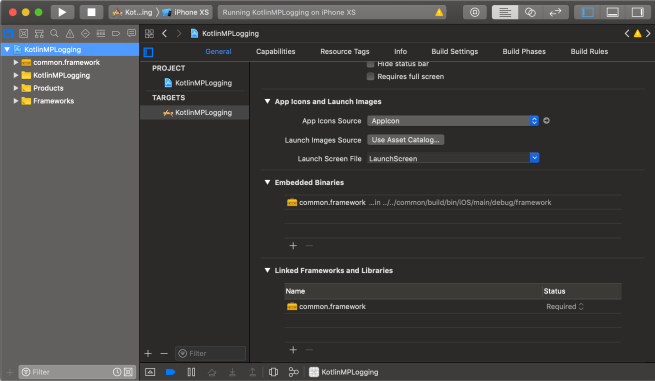
Also, add the Framework path by going into “Build Settings” Framework Search Paths:

Screen Shot 2018-10-14 at 4.36.50 PM.png

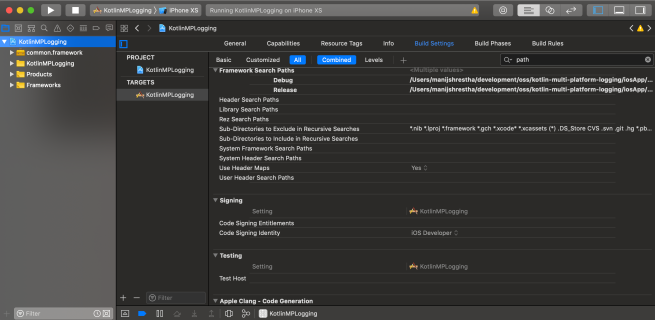
With these changes, you should be able to compile and run the app without any issues.

At this stage, we are going to create the IosAnalyticsManger. Create IosAnalytiscManager.swift class in the project with implementation of your choice. For this demo we are going to print the Event detail in the console.

import Foundation
import common
class IosAnalyticsManager : AnalyticsManager {
func report(event: Event) {
print("Interaction \(event.eventName()) happened with property \(event.eventProperties().debugDescription)")
}
}

Similar to android app we are going to add 3 buttons in the storyboard and link the click action to our view controller.

Screen Shot 2018-10-14 at 4.41.11 PM.png

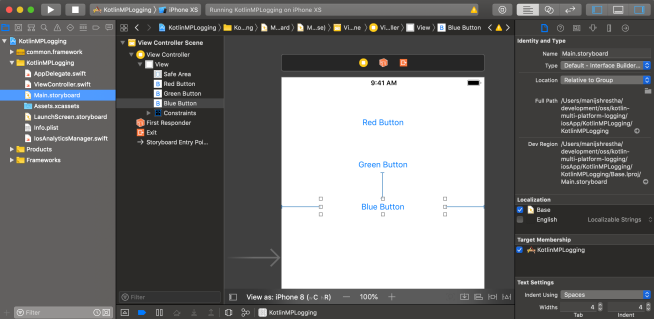
We will link these buttons to our view controller.

import UIKit
import common
class ViewController: UIViewController {
let anatlyicsManager = IosAnalyticsManager()
override func viewDidLoad() {
super.viewDidLoad()
// Report page is viewed
anatlyicsManager.report(event: ViewEvent.init(pageName: "Main Page"))
}
@IBAction func redButtonClicked(_ sender: Any) {
anatlyicsManager.report(event: ButtonClickEvent.init(buttonName: "Red"))
}
@IBAction func greenButtonClicked(_ sender: Any) {
anatlyicsManager.report(event: ButtonClickEvent.init(buttonName: "Green"))
}
@IBAction func blueButtonClicked(_ sender: Any) {
anatlyicsManager.report(event: ButtonClickEvent.init(buttonName: "Blue"))
}
}

Now, run the app and we should be able to see the app in action:

Screen Shot 2018-10-14 at 4.44.57 PM

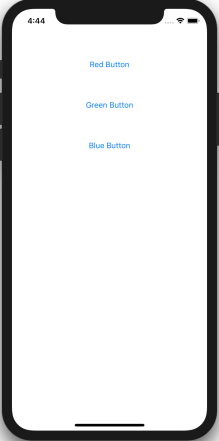
As the page is loaded, Page View Event is reported, similarly as we tap on each button the Button Clicked Event is reported. In our case, we can see the output in the console log.

Screen Shot 2018-10-14 at 4.46.12 PM

Summary:

To wrap it all up, we built “common” component using Kotlin Multiplatform plugin. We defined Event and AnalyticsManager there. We built Android app that used implemented the interface defined in the common. We then used it to repot the event. Similarly, we built iOS app, we implemented the protocol defined in common. We then used the exact same Event class defined in common to report the event.

This is just scratching the surface of whats possible with Kotlin Multiplatform. I hope this shows the potential of whats possible. I hope you found this post helpful. Until next time, adios amigos.

Sample code for this project is found in github: https://github.com/manijshrestha/kotlin-multi-platform-logging


References:

Kotlin Multiplatform Project: iOS and Android


Using Room with Kotlin

If I was really exited to hear about Android Architecture Components in Google I/O 2017. In particular Room Persistence Library. I had pleasure talking with folks working on it in person during I/O! I want to try it for my own.

I had been using Kotlin prior to the I/O announcement. Having google fully commit it to as a first class citizen on Android was very encouraging.

In this post, I wanted to show how you can start using Room with Kotlin.

I started with a shell project with Dagger 2 setup. We will implement Room in Kotlin project using Dagger2, later will also integrate it with RxJava2.

I am going to use a simple “ToDoList” app, that allows users to add a Task in the application. So first off, lets include the library.

Including Room

In your build.gradle file, include the room dependency. (1.0.0-alpha1 was the latest version at the time of this writing)

dependencies {
....
compile "android.arch.persistence.room:runtime:1.0.0-alpha1"
kapt "android.arch.persistence.room:compiler:1.0.0-alpha1"
...
}
view raw build.gradle hosted with ❤ by GitHub

Defining Entities

Let’s now create `Task` entity. For now we will make it simple with id, description and boolean flag to indicate if the task is completed.

import android.arch.persistence.room.ColumnInfo
import android.arch.persistence.room.Entity
import android.arch.persistence.room.PrimaryKey
@Entity(tableName = "task")
data class Task(@ColumnInfo(name = "completed_flag") var completed: Boolean = false,
@ColumnInfo(name = "task_desciption") var description: String) {
@ColumnInfo(name = "id")
@PrimaryKey(autoGenerate = true) var id: Long = 0
}
view raw Task.kt hosted with ❤ by GitHub

If you notice, it is for the most part just a regular “data class“. We are just adding annotation for Room to make sense of it.

@Entity(tableName = “task”) as it denotes, is using the table name called “task”. If name is not specified, by default class name is used as the Table name.

@ColumnInfo annotation on  a field relating it to the column on the table. e.g. in this example you can see that on the db column name uses “_”.

@PrimaryKey(autoGenerate = true) is applied to “id” field. which in this case is autogenerated. An entity must have at least 1 PrimaryKey.

Defining Dao

Dao is where Room does its magic. We just need to define a interface along with the SQL queries. Room at compile time generates the actual implementation of this class for us to use. This may remind you of Retrofit, This is exactly what happening here.

@Dao interface TaskDao {
@Query("select * from task")
fun getAllTasks(): List<Task>
@Query("select * from task where id = :p0")
fun findTaskById(id: Long): Task
@Insert(onConflict = REPLACE)
fun insertTask(task: Task)
@Update(onConflict = REPLACE)
fun updateTask(task: Task)
@Delete
fun deleteTask(task: Task)
}
view raw TaskDao.kt hosted with ❤ by GitHub

As you can see, we have an interface which is annotated with @Dao, in there we can see multiple functions annotated with various other annotations.

Lets look at one of them, “fun getAllTasks(): List”, this function returns list of all tasks from the database. This function is annotated with @Query annotation. In there we have the sql query specified. This query is validated at compile time. If the query is malformed it will fail the build. With this you can feel confident that if it compiles, it will work.

Now let’s look at the little more complex one. “fun findTaskById(id: Long): Task”. This function is annotated with @Query(“select * from task where id = :p0”).

There is a currently a bug where kotlin converts the parameters to p0, arg0 etc. Hence, the query above specified “:p0”. Ideally we should be able to say “:id”. This will be fixed in the near future. Until then, pay close attention to compile errors to identify this type of mismatch.

Defining Database

We define our database by creating an abstract class that extends RoomDatabase.

@Database(entities = arrayOf(Task::class), version = 1, exportSchema = false)
abstract class AppDatabase : RoomDatabase() {
abstract fun taskDao(): TaskDao
}
view raw AppDatabase.kt hosted with ❤ by GitHub

Class is annotated with @Database which defines the all the entities(table) it contains, its version. If you look closely, “exportSchema” is set to false here. If you do not, it defaults to “true” which generates a compile time warning as you can see blow:

warning: Schema export directory is not provided to the annotation processor so we cannot export the schema. You can either provide `room.schemaLocation` annotation processor argument OR set exportSchema to false.

This is class pretty much like dagger component, this exposes Dao we defined above. Here we are exposing “TaskDao”

Configuring in Dagger

Like dagger, we will build the room database. Note, this is an expensive operation so, we would want a singleton object. Lets look at the configuration here:

@Module class AppModule(private val context: Context) {
@Provides fun providesAppContext() = context
@Provides fun providesAppDatabase(context: Context): AppDatabase =
Room.databaseBuilder(context, AppDatabase::class.java, "my-todo-db").allowMainThreadQueries().build()
@Provides fun providesToDoDao(database: AppDatabase) = database.taskDao()
}
view raw AppModule.kt hosted with ❤ by GitHub

We are building Room database using the application context, We point to the abstract class we defined above, database file name we want.

We are calling following function so that we can run queries in main thread.

.allowMainThreadQueries()

If we did not call this, we would see an exception indicating that we cannot access database on main thread.

Caused by: java.lang.IllegalStateException: Cannot access database on the main thread since it may potentially lock the UI for a long periods of time.

In the later part we will be using RxJava and we will get rid of this. For now, lets move on. We are using Dagger to provide the TaskDao also.

Getting Entities in Presenter

In this example we are using MVP pattern. Lets see how we can get the entities and show it in a recycler view.

class ToDoPresenter @Inject constructor(val taskDao: TaskDao) {
var tasks = ArrayList<Task>()
var presentation: ToDoPresentation? = null
fun onCreate(toDoPresentation: ToDoPresentation) {
presentation = toDoPresentation
loadTasks()
}
fun onDestroy() {
presentation = null
}
fun loadTasks() {
tasks.clear()
tasks.addAll(taskDao.getAllTasks())
presentation?.showTasks(tasks)
}
fun addNewTask(taskDescription: String) {
val newTask = Task(description = taskDescription)
tasks.add(newTask)
taskDao.insertTask(newTask)
(tasks.size - 1).let {
presentation?.taskAddedAt(it)
presentation?.scrollTo(it)
}
}
}

Thats it! At this point we are able to define Task entity, use Room to fetch the entities and display them on a Recycler view.

Using Room with RxJava/RxAndroid with Kotlin

Let’s take this up a notch by introducing RxJava/RxAndroid. Add the RxJava/RxAndroid dependency in our build file by adding the following.

compile "io.reactivex.rxjava2:rxjava:2.1.0"
compile "io.reactivex.rxjava2:rxandroid:2.0.1"

We would also need to add one more dependency

compile "android.arch.persistence.room:rxjava2:1.0.0-alpha1"

With this we can now start using Room with RxJava.
Let’s change our function that returned list of Task to return a Flowable.

 @Query("select * from task")
 fun getAllTasks(): Flowable<List<Task>>

With this we can now remove “allowMainThreadQueries()”. Our Module would simply do

<pre>@Provides fun providesAppDatabase(context: Context): AppDatabase =
Room.databaseBuilder(context, AppDatabase::class.java, "my-todo-db").build()

We will then need to modify our presenter to use the updated function. Here is the full presenter.

package com.manijshrestha.todolist.ui
import com.manijshrestha.todolist.data.Task
import com.manijshrestha.todolist.data.TaskDao
import io.reactivex.Observable
import io.reactivex.android.schedulers.AndroidSchedulers
import io.reactivex.disposables.CompositeDisposable
import io.reactivex.schedulers.Schedulers
import javax.inject.Inject
class ToDoPresenter @Inject constructor(val taskDao: TaskDao) {
val compositeDisposable = CompositeDisposable()
var tasks = ArrayList<Task>()
var presentation: ToDoPresentation? = null
fun onCreate(toDoPresentation: ToDoPresentation) {
presentation = toDoPresentation
loadTasks()
}
fun onDestroy() {
compositeDisposable.dispose()
presentation = null
}
fun loadTasks() {
compositeDisposable.add(taskDao.getAllTasks()
.subscribeOn(Schedulers.io())
.observeOn(AndroidSchedulers.mainThread())
.subscribe({
tasks.clear()
tasks.addAll(it)
(tasks.size - 1).takeIf { it >= 0 }?.let {
presentation?.taskAddedAt(it)
presentation?.scrollTo(it)
}
}))
presentation?.showTasks(tasks)
}
fun addNewTask(taskDescription: String) {
val newTask = Task(description = taskDescription)
compositeDisposable.add(Observable.fromCallable { taskDao.insertTask(newTask) }
.subscribeOn(Schedulers.io())
.observeOn(AndroidSchedulers.mainThread())
.subscribe())
}
}

todolist

And that is it!, At this point you have Room, Dagger, RxJava all working together using Kotlin!

You can find completed sample at https://github.com/manijshrestha/ToDoList

Using Android Beam/NFC to transfer Data

Most of the Android devices have NFC reader built in. NFC can be used to transfer data between two devices, trigger actions on device etc.
In this post I am going to build a simple app that transfers data between two devices using NFC.

It is important to understand how NFC works. I am not going to explain those in detail as there are many resources on the internet that does a really good job of explaining the technology.

Goal of this post is to build a simple Android application that will send some text data over to another NFC capable Android Device. To test this you will need two android devices with NFC. You will need to deploy the application to both the devices.

So to enable NFC on you app, the very first thing you would need to do is setup permission in AndroidManifest.xml

Permissions

Add the following tag to the AndroidManifest.xml to access the NFC hardware.

<uses-permission android:name="android.permission.NFC" />

Also add uses-feature tag to specify the feature used by the application. If the Application must have the NFC, you would want to add android:required=”true” attribute to it.

<uses-feature android:name="android.hardware.nfc" />

We would need to use SDK level 14+ to be able to use Android Beam. SDK level 9 has very limited support so you would want to use SDK level 10 at minimum for good NFC support.

<uses-sdk android:minSdkVersion="16"/>

Message Sender Activity

We will simply implement NfcAdapter.CreateNdefMessageCallback interface. This will require us to implement NdefMessage createNdefMessage(NfcEvent nfcEvent)
This method will be called when Android Beam is invoked. Here is the method implementation.

   @Override
    public NdefMessage createNdefMessage(NfcEvent nfcEvent) {
        String message = mEditText.getText().toString();
        NdefRecord ndefRecord = NdefRecord.createMime("text/plain", message.getBytes());
        NdefMessage ndefMessage = new NdefMessage(ndefRecord);
        return ndefMessage;
    }

In our onCreate method we need to get NfcAdapter and set the callback to this class. Here is the snippet.

.. ..
 @Override
    protected void onCreate(Bundle savedInstanceState) {
.. ..
       NfcAdapter mAdapter = NfcAdapter.getDefaultAdapter(this);
        if (mAdapter == null) {
            mEditText.setText("Sorry this device does not have NFC.");
            return;
        }

        if (!mAdapter.isEnabled()) {
            Toast.makeText(this, "Please enable NFC via Settings.", Toast.LENGTH_LONG).show();
        }

        mAdapter.setNdefPushMessageCallback(this, this);
.. ..
    }
.. ..

So that’s all to it to be able to send a NFC NDEF message.

NFC Intent

Lets create another Activity that will be respond to the NDEF message and display the message.
In the activity we just need to inspect “Intent” and pull NDEF message.
In this demo we will name this activity as NFCDisplayActivity. We will check for the info onResume() as such

   @Override
    protected void onResume(){
        super.onResume();
        Intent intent = getIntent();
        if (NfcAdapter.ACTION_NDEF_DISCOVERED.equals(intent.getAction())) {
            Parcelable[] rawMessages = intent.getParcelableArrayExtra(
                    NfcAdapter.EXTRA_NDEF_MESSAGES);

            NdefMessage message = (NdefMessage) rawMessages[0]; // only one message transferred
            mTextView.setText(new String(message.getRecords()[0].getPayload()));

        } else
            mTextView.setText("Waiting for NDEF Message");

    }

Here we are verifying that, this activity was triggered by NDEF_DISCOVERED action. (There are 3 possible actions, NDEF_DISCOVERED, TECH_DISCOVERED and TAG_DISCOVERED)
We then extract the Parcelable extra message from the intent and put that in a text view.

You will need to configure this Activity in your AndroidManifest.xml like below

  <activity
            android:name=".NFCDisplayActivity"
            android:label="NFC Data Display">
            <intent-filter>
                <action android:name="android.nfc.action.NDEF_DISCOVERED" />
                <category android:name="android.intent.category.DEFAULT"/>
                <data android:mimeType="text/plain" />
            </intent-filter>
        </activity>

With that when NFC message comes with mimeType of “text/plain”, it will start our Display Activity.

You can find my the entire project in github https://github.com/manijshrestha/AndroidNFCDemo.

Here is the Video of the app.

Dynamic Image View Flipper using Ion

There are instances where you would want to load images from the internet into a viewflipper. In this post we will build a viewflipper in which images will be loaded dynamically using a library called Ion. This library does lot more than loading images. Ion takes over previous library called UrlImageViewHelper.

I am using Android Studio to build this example. If you are using Eclipse steps will be the same except for how you would import the library.

Create an android project in Android studio or Eclipse. then,

Importing Library

Android Studio: Open build.gradle, add the following line.

dependencies {
    compile 'com.koushikdutta.ion:ion:1.1.5'
}

This will add ion as a dependency. When the project is being built, it will download the dependency for you.

Eclipse: Download the ion.jar from github. Include the jar in your project build path.

AndroidManifest.xml

Since we are going to be getting the image from the internet we will need to add the internet permission in the manifest file.
Add the following permission in AndroidManifest.xml

<uses-permission android:name="android.permission.INTERNET"/>

Layout

For this demo we are going to create a layout with viewflipper and two buttons that will let us go “next” and “previous”.

<LinearLayout xmlns:android="http://schemas.android.com/apk/res/android"
    xmlns:tools="http://schemas.android.com/tools"
    android:id="@+id/container"
    android:layout_width="match_parent"
    android:layout_height="match_parent"
    android:orientation="vertical"
    tools:context=".DynamicImageFlipperActivity">

    <ViewFlipper
        android:id="@+id/viewFlipper"
        android:layout_height="0dp"
        android:layout_weight="1"
        android:layout_width="match_parent">

    </ViewFlipper>


    <RelativeLayout
        android:layout_height="wrap_content"
        android:layout_width="match_parent"
        android:layout_weight="0">

        <Button
            android:id="@+id/previousButton"
            android:layout_height="wrap_content"
            android:layout_width="wrap_content"
            android:layout_alignParentLeft="true"
            android:text="<< Previous" />

        <Button
            android:id="@+id/nextButton"
            android:layout_height="wrap_content"
            android:layout_width="wrap_content"
            android:layout_toRightOf="@id/previousButton"
            android:layout_alignParentRight="true"
            android:text="Next >>" />

    </RelativeLayout>

</LinearLayout>

Activity

We will create a ImageView programatically and load it with image from the internet. To do so lets create a helper method in your Activity.

  protected ImageView getNewImageView() {
        ImageView image = new ImageView(getApplicationContext());
        image.setScaleType(ImageView.ScaleType.CENTER_INSIDE);
        return image;
    }

Only thing this method will do is create a ImageView.
Now the way we use Ion is as follows.

Ion.with(imageView)
   .placeholder(R.drawable.loading)
   .load(URL_TO_IMAGE);

This will load the “imageView” with placeholder image while the image is being downloaded from the internet. “load” method takes a string parameter which is the URL to the image. We can also provide animations etc if you would like you can get more info from Ion documentation.

Here is the completed Activity:

public class DynamicImageFlipperActivity extends Activity {

    private List<String> imageURLs = Arrays.asList(new String[]{
            "http://manijshrestha.github.io/android-icon.png",
            "http://manijshrestha.github.io/iPhone-icon.png",
            "http://manijshrestha.github.io/windows-icon.png"});

    private int index = 0;

    private ViewFlipper mViewFlipper;
    private Button mPreviousButton;
    private Button mNextButton;

    @Override
    protected void onCreate(Bundle savedInstanceState) {
        super.onCreate(savedInstanceState);
        setContentView(R.layout.activity_dynamicimageflipper);
        mViewFlipper = (ViewFlipper) findViewById(R.id.viewFlipper);
        mPreviousButton = (Button) findViewById(R.id.previousButton);
        mNextButton = (Button) findViewById(R.id.nextButton);

        ImageView image = getNewImageView();
        image.setImageResource(R.drawable.ic_launcher);

        mViewFlipper.addView(image);
        mNextButton.setOnClickListener(new View.OnClickListener() {

            @Override
            public void onClick(View v) {
                ImageView imageView = getNewImageView(); // Where we will place the image
                Ion.with(imageView)
                        .placeholder(R.drawable.loading)
                        .load(getNextImage());

                mViewFlipper.addView(imageView); // Adding the image to the flipper
                mViewFlipper.showNext();
            }
        });

        mPreviousButton.setOnClickListener(new View.OnClickListener() {
            @Override
            public void onClick(View view) {
                mViewFlipper.showPrevious();
            }
        });

    }

    protected ImageView getNewImageView() {
        ImageView image = new ImageView(getApplicationContext());
        image.setScaleType(ImageView.ScaleType.CENTER_INSIDE);
        return image;
    }

    protected String getNextImage() {
        if (index == imageURLs.size())
            index = 0;
        return imageURLs.get(index++);
    }
}

At the end the app will look like image below:
device-2013-12-21-093810

device-2013-12-21-093856

You can find the complete project in my github repo:
https://github.com/manijshrestha/DynamicImageViewFlipperProject

Chromecast Hello World – Part 2, Receiver App

This is the second part of the Hello World app we started earlier.

In this part we are going to create a receiver app for Chromecast.

Overview

Receiver application is notting but a web application that gets loaded on the Chrome browser that is in the Cast device. Only one caveat, In order to load the web application we need to whitelist the application. We do not give it a absolute URL but a App_ID that google provides when you whitelist your domain (it will make more sense later in the post below).
This web application is launched on the cast device when a sender app, sends the message to do so. At this time there is a websocket connection between the sender and receiver which is managed by the Cast API. This API exposes ability to transmit commands between sender and receiver. We can do the standard play, pause etc. In addition we can send any free form of message as we choose. This is how authentication is done on the receiver app as well. (Passing Auth token from sender app to receiver app, that is how it would play content on netflix app).

Lets gets started.

Receiver App

Receiver app will be much simpler and we would want to keep it that way because cast has limited resources. You would not want to perform heavy computation on receiver app.
To create a receiver app, you begin with importing the following script on your receiver html page.

<script src="https://www.gstatic.com/cast/js/receiver/1.0/cast_receiver.js"></script>

With that we now can initialize our receiver application.
To do this, we start by creating Receiver object. This receiver object lets us perform media actions on the media content in the page.
Receives notification when media play is complete and sends it to the sender application. (There are some guidelines provided by Google on how we should manage this, but for this demo we are going to simply play an mp3)
Lets add the script below:

      <script type="text/javascript">

	var receiver = new cast.receiver.Receiver(
	    'YOUR_APP_ID', [cast.receiver.RemoteMedia.NAMESPACE], "", 5);
	var remoteMedia = new cast.receiver.RemoteMedia();
	remoteMedia.addChannelFactory(
	    receiver.createChannelFactory(cast.receiver.RemoteMedia.NAMESPACE));

	receiver.start();

	window.addEventListener('load', function() {
	  var elem = document.getElementById('music-player');
	  remoteMedia.setMediaElement(elem);
	});

	</script>

Here, we create a Receiver object with the App_ID provided google, this would be the App_ID that sender application would have sent to cast. We then setup the media element that will be managed by Cast. (In this case there is a audio element that has an id of ‘music-player’).

Here is the full HTML of the receiver application:

<html>
   <script src="https://www.gstatic.com/cast/js/receiver/1.0/cast_receiver.js"></script>
   <script type="text/javascript">

	var receiver = new cast.receiver.Receiver(
	    'YOUR_APP_ID', [cast.receiver.RemoteMedia.NAMESPACE], "", 5);
	var remoteMedia = new cast.receiver.RemoteMedia();
	remoteMedia.addChannelFactory(
	    receiver.createChannelFactory(cast.receiver.RemoteMedia.NAMESPACE));

	receiver.start();

	window.addEventListener('load', function() {
	  var elem = document.getElementById('music-player');
	  remoteMedia.setMediaElement(elem);
	});

   </script>

   <body>
      <img src="logo.png"/>
      <audio autoplay id="music-player">
         <source src="test.mp3" type="audio/mpeg">
      </audio>
   </body>
</html>

Screen Shot 2013-09-15 at 1.21.00 PM

Thats it!, we have the receiver application that. This page is simple when loaded will play the test.mp3 music on the receiver. Remember the media controls we did on the sender, like pause, stop. That will mange this audio here. You can try my sender app from github. Load the “music-player.html”

Full code could be found on github. https://github.com/manijshrestha/chromecast

Chromecast Hello World

Since the launch of google chromecast, I had been thinking about writing a quick app. Here is my attempt to build a simple chromecast app.
This will be multipart post as chromecast app needs different pieces to work together.

Chromecast Overview
Chromecast app consist of 2 part. One is the “Sender” App and another is the “Receiver”. Below image describes how it all fits together:
https://developers.google.com/cast/images/Diagram.jpg
Sender app can be a web app or a native ios or an android app.

Only thing sender does is to message the chromecast device to play a content. It can pass various parameters.

Behind the scene, your device and cast device in the network is using a managed websocket connection.

Today I am going to start with a simple web app as a sender app that will play youtube content on your cast device.
Google Chromecast web app can be a simple html page where “Chrome cast plugin” in Chrome browser will inject cast specific stuff to it.

Before we begin there are few things we need to take care of.

We must be running Chrome version 28 or higher.

Download the chomecast extension from chrome web store.

Enable developer option

We would need to enable developer option for your cast extension.
Here is how: Open “chrome://extensions” on your browser address bar.
Look for “Google Cast” extension, click on “options”, You should see page like below:

Screen Shot 2013-09-14 at 2.05.52 PM

Click on the cast icon 4 times. You should see following developer options appear (Google Loves Easter Egg… 🙂 )

Screen Shot 2013-09-14 at 2.08.44 PM

While you are at it, put “localhost” in the box, so the chromecast extension will inject in the required javascript on your page. You can add more domain as you would like but remember you need to get google’s blessing and get it whitelisted first.

White listing your receiver

In order build application and run on your chromecast for development, you will need to “whitelist” your device. Detailed instruction could be found here:
It takes few hours to a day to get it approved. You can get 2 URL whitelisted as well, usually one for test and one for production.

Sender

Sender Part of the application is responsible to detect available cast devices in the network. Sender app then is able to launch the given application on the Receiver cast device.

This tutorial we will be building a simple Sender app, that will open youtube on your cast device. Lets get started.
To test this, I had apache server running on my machine where I could host my app to send these messages to cast device. (Remember we had to put localhost on the extension?, without that it would not have initialized the cast api)

So Lets get it started.

First thing we need to do is to tell cast that it is able to “cast” content, to do this we need to put data-cast-api-enabled=”true” attribute on the html tag.

<html data-cast-api-enabled="true">
<head>
	<title>Chromecast Sender</title>
.. .. ..

I am going to be using very simple page and jquery to put it all together rather than using other js framework to demonstrate this.

Lets import the jQuery in our page

<script src="http://code.jquery.com/jquery-2.0.3.min.js"></script>

Now, let the fun begin, start a new script tag and lets initialize the cast.

   var cast_api, cv_activity;
   var receiverList = {};

   // Wait for API to post a message to us
   window.addEventListener("message", function(event) {
     if (event.source == window && event.data && event.data.source == "CastApi" && event.data.event == "Hello") {
	    initializeApi();
     }
   });

Here we what we did, we created some global variables to keep track of things. We added a event listener, this is because, the chomecast extension basically triggers this event. We verify it by running those checks 🙂 CastApi sends “Hello” event telling our page that cast extension is present. When this happens, we start by calling our initializeApi function.

Lets write that function,

   initializeApi = function() {
      cast_api = new cast.Api();
      cast_api.addReceiverListener("YouTube", onReceiverList);
      };

We are creating an instance of cast.Api telling it that we will be calling “YouTube” receiver app. The second parameter is the function name that will be called by cast api with list of receiver that is available.

Lets take care of that now.

   onReceiverList = function(list) {
   if (list.length > 0 ) {
      $("#receivers").empty();
      $.each(list, function(index, receiver){
         receiverList[receiver.id] = receiver;
         $device = $("<input type='radio' name='device-to-play' data-receiver-id=" +receiver.id+">"+receiver.name+"</li>");
         $("#receivers").append($device);
       });
    } else {
      $("#receivers").html("Opps No Cast device was found in the network.");
    }
   };

“list” consist of all the receiver that is available currently. We need to keep track of this so that we can send message to particular receiver later.

So, at this point we now have a sender application that is aware of cast devices that we can send message to.

Lets, send a message now.

Sending a message

We send a message to a receiver cast device via javascript. The device will then start the activity (“Activity”, if you have done some android stuff, you will feel right at home)
For this demo, lets assume that we are going to start a youtube video, we pass on the video id to be played.

	doLaunch = function(receiver, videoId) {
					var request = new cast.LaunchRequest("YouTube", receiver);
					request.parameters = "v="+videoId;
					request.description = new cast.LaunchDescription();
					request.description.text = "Playing Via Sender App";
					cast_api.launch(request, onLaunch);
				}

Here we are telling the cast device that we want to start “YouTube” app. (This could be other app id as well, we will talk about it in receiver section).
“receiver”, is one of the receiver we got from the list above.
we then call the “launch” function with a callback function name, in this case we call it “onLaunch”. This function will be called by the api once it gets a response from the receiver.

Here is onLaunch:

onLaunch = function(activity) {
					if (activity.status == "running") {
						cv_activity = activity;
						$("#status").html("On Air");
					} else {
						$("#status").html("Idle");
					}
				}

When we get the activity response we can check its status to know whats going on. If it is “running” we know that it is now running the activity. On the UI, we are putting “On Air” message “Idle” otherwise. (Currently you could get one of the three status: ‘running’, ‘stopped’, or ‘error’)

Thats it with the code above you are now able to fire up an activity on cast device.
Lets cover one more thing. If you need to send other message such as “pause” or “stop”, we would need to pass on activity id and call back function that needs to be called.
I am going to show how to stop the running media below:

   doStop = function() {
                         cast_api.stopActivity(cv_activity.activityId, onStop);
                       }

   onStop = function(mediaResult) {
					$("#status").html(mediaResult.status);
				}

Here we are calling “stopActivity” along with activityId of the running activity and a function to call, in this case it is “onStop”. Here we are simply putting the status string on the page.

You can see my sender.html code in following gist

Here is the github repo if you want to look at full code.
https://github.com/manijshrestha/chromecast/blob/master/sender/sender.html

Here is a view of finished product.
Screen Shot 2013-09-14 at 3.25.11 PM

Using SSH like a Pro

SSH is probably the most used command on my machine. If you use linux or OSX, ssh is most likely preinstalled for you. Even if you use windows, most likely you have Putty installed to securely connect to other machines. Today, I am going to show few things about the way I use SSH and may help you using it efficiently as well.

Keys Keys Keys…
The heart and power of ssh comes with its Public Key cryptography, using keys effectively you can eliminate the use of username and passwords completely. If not used correctly, it could be dangerous thing.
Setting up a key pair will let us connect to a server w/o having to key in a username and passwords. (I will discuss further below:)

Creating a key pair

You can use “ssh-keygen” to generate a key-pair on your local machine.
You may want to skip the “passphrase”, having it adds an extra layer of security but if you want to seamlessly be able to connect to servers or connect via scripts, having a passphrase will not help.

Here is how you can create a ssh key (rsa):

$ ssh-keygen -t rsa

You will output like below: Note here you can simply hit enter to continue or specify location of a file and passphrase

Generating public/private rsa key pair.
Enter file in which to save the key (/home/username/.ssh/id_rsa): 
Enter passphrase (empty for no passphrase): 
Enter same passphrase again: 
Your identification has been saved in /home/username/.ssh/id_rsa.
Your public key has been saved in /home/username/.ssh/id_rsa.pub.
The key fingerprint is:
31:XX:ee:XX:aa:bb:XX:XX username@linux
The key's randomart image is:
+--[ RSA 2048]----+
|                 |
|                 |
|        .        |
| .   + o +       |
|      o S        |
|.o . o           |
|...+....         |
|..===...         |
|........         |
+-----------------+


At this point you should have 2 files in your “.ssh” folder

$ cd ~/.ssh
$ ls -l
-rw-------  1 username  admin  1557 May 22 21:23 id_rsa
-rw-r--r--  1 username  admin   410 May 22 21:23 id_rsa.pub

In most cases you dont have to touch either of them except that you should know its existence. If you use cygwin or someone else modified/copied the file changing its permission, you will have problem. Pay close attention to the file permission. The “id_rsa”, ie. the private key must have RW to owner only. If the permission is not set correctly, SSH will not use your keys.

identity

Now you have a key pair you can use. Lets go ahead and use it.
Normally you may already know that you would connect to remote server by running a command like below:

$ ssh remoteuser@remoteserver
... Enter password...

Since we create a key lets setup it up.

ssh-copy-id

You can copy your public key over to remote host using the ssh-copy-id command:

$ ssh-copy-id -i ~/.ssh/id_rsa remoteuser@remoteserver
remoteuser@remoteserver's password: [ENTER PASSWORD]
Now try logging into the machine, with "ssh 'remoteuser@remoteserver'", and check in:

  ~/.ssh/authorized_keys

to make sure we haven't added extra keys that you weren't expecting.

Lets login to the remote server. We can simply run the ssh command along with the identity file.

$ ssh -i ~/.ssh/id_rsa remoteuser@remoteserver

You should notice that we just logged into the remote server w/o entering a password.
In the ssh command we passed “-i” flag along with the location to our private key. This means, we passed our identity file as our id_rsa private key telling ssh to use it to connect to the remote server.

If you have multiple key pairs and long list of servers to go along with it, it might be hard to keep track and hard to manage. If you use Amazon EC2, or other private/public cloud, you know will have to keep track of them specially with hard server names and multiple keys.
But, there is a solution for that. And it is “config” file.

The ssh “config” file

“config” file in your “.ssh” folder does a lot of magic. I will show you some tricks.
If the file doesn’t already exist, you can just create one. If the file exist, you can keep adding entries at the end of the file.
I will explain an entry here:
So to go along with our example. We can now setup a config to our remote server.
Let’s add following entry in our config file.

$ vi ~/.ssh/config
...
...
...

Host rs
HostName remoteserver
User username
IdentityFile ~/.ssh/id_rsa

Here we added all the information we need to connect to our remoteserver. We entered “User” that we will login as. Pointed to your private key. At the very first we added a word “rs” after Host, ie. we are giving an alias to my “remotesever”. So we can now do “ssh rs”.
Try it for yourself.

$ ssh rs

Walla you just logged in to your remote server w/o a password yet with one single word.

Port Forwarding

Port Forwarding is an advanced feature of ssh. It is very useful in many cases.
Using port forwarding, your communication over the port is encrypted over ssh. This creates a p2p “tunnel” between the server and you.
This is often referred as poor man’s vpn.

Local Forwarding

Local port forwarding will let us forward any communication that happens in our “local” box on that port to be forwarded on to the remote server.
Let’s say that we have mysql installed in our remote server. We want to connect to that database from our local server as if it is installed locally, we can configure it as follows:

$ ssh rs -L 3306:localhost:3306

Above we configured a local port forwarding (“-L”), we binded our local port “3306”, to remote port “3306” on the localhost i.e. the remote host.
this means if you configure your application to connect to “localhost:3306″, it is actually connecting to the port 3306 on the remote server.
You can have more than one port forwarding. If you want more, simply add more ” -L localport:host:remoteport”

Another example to clarify this more:
Lets say you want to bind port 8181 on your local box to point to http://www.cnn.com through the ssh connection. (Basically the traffic to cnn.com will be routed from the remote box)

$ ssh -L 8181:www.cnn.com:80 rs

Now, open a browser and navigate to “localhost:8181”. You will see that cnn.com page comes up :).

Screen Shot 2013-05-22 at 10.22.01 PM

Remote Forwarding

Similar to local forwarding, we can bind a port on the remote box back to our local machine. This is done via “-R” flag.

$ ssh -R 8282:localhost:8585

After ssh connection is established, on the remote box’s port 8282 is bound back to box initiating the connection to port 8585.

Using port forwarding, remote and local, you can create these tunnels between servers.

SOCKS-PROXY

SSH could be used as socks proxy. To explain this lets say the machine you are using locally does not have access to the internet. Or your access to facebook or youtube is blocked. But say a “remote” server has unrestricted access to the internet and is able to surf facebook or youtube.
You can setup a ssh dynamic port binding and use it as socks proxy. This means, your local machine can access those site through the “remote” server bypassing the firewall. Your connection to facebook / youtube is happening through the secure “tunnel”.
Let’s set one up.

$ ssh -C -D 1080 remoteserver

You can now configure your browser to use “localhost:1080” as SOCKS proxy.
Screen Shot 2013-05-22 at 10.43.15 PM

You can go to any site on that browser and all the web traffic will be routed over through remoteserver.

Hope this helps you use ssh like a pro 🙂

Moving on from Linux to OSX

I recently started using a mac. Being a long time Ubuntu user, I thought it was going to be a smooth transition. I found it otherwise. I didn’t think it would be this hard. Things I never thought would have bothered me, for instance being able to tap, “Ctrl + X” to “cut” within the Finder window and paste it elsewhere. Being able to install tools via command line etc.
So here is the list of things I setup, which helped me to be more productive and IMHO more intuitive user experience.

1. Brew http://mxcl.github.io/homebrew/
Coming from Ubuntu, I got used to “apt-get” package manager. It made it very easy to manage software via command line. On mac, going through the App store and or manual install felt so old school. Luckily there were many alternatives around. One of them is Homebrew. It truly is the missing package manager for OSX.
It installs the packages in “/usr/local/Cellar”, so its easy to locate things that were installed via brew.

2. XtraFinder http://www.trankynam.com/xtrafinder/
If you come from Windows or Ubuntu, you probably are used to “cut”, “paste” either by keyboard shortcut or via context menu. On Mac, context menu in Finder, did not include this option. Furthermore, I could not simply ctrl+x, ctrl+p a directory or a file within finder. I heard about TotalFinder. But I wanted to see if there was any other alternative and I did find XtraFinder.
XtraFinder is a free plugin that adds these missing features to Finder. It allows you to customize other behaviors such as open the file/directory when you press “enter”. Also has snappy side by side dual pane and also tabs.
XtraFinder

3. MenuCalendar Clock http://www.objectpark.net/mcc.html
I really liked the Ubuntu’s pull down calendar. I am so used to pick on the time in menu bar see the month. MenuCalendar clock solved this one. This is a paid app if you want to use all its features. Unregistered version gives you basic feature which is good enough for general use. Clicking on a date opens iCal, which is very neat.
MenuCalendar

4. Menu Meters http://www.ragingmenace.com/software/menumeters/index.html
As a developer I constantly find myself looking at the system resource usage. Menu Meters provides memory, CPU, disk and network usage graph right on the menu bar. It is customizable to your needs. You can configure things you want to monitor and choose colors in the graph etc.
MenuMeters

5. Size Up http://www.irradiatedsoftware.com/sizeup/
SizeUp allows you to quickly resize and position your windows with keyboard shortcuts or a handy menu bar icon. You can move windows between workspaces, maximize, minimize, stick window to right or left etc.
https://i0.wp.com/www.irradiatedsoftware.com/images/sizeup/mainfeature-actions.png

6. ClipMenu http://www.clipmenu.com/
ClipMenu is a freeware tool that manages your clipboard history. It also allows you to have snippets of frequently used items.
ClipMenu

7. Mounting NTFS with full read/write access http://crosstown.coolestguyplanettech.com/os-x/44-how-to-write-to-a-ntfs-drive-from-os-x
By default OSX mounts NTFS formatted drives in read mode. It does not allow you to write to NTFS formatted device. This is a pain if you have external drives that you use with your Windows machine etc. My search on the internet, suggested to format the drive to FAT32, which OSX does support r/w natively. But I really didn’t like that idea. There are some paid applications out there that allows you to write to NTFS formatted drives on OSX. However, I found this blog entry to be very effective. This allows you to read write to your NTFS drives, and the good thing is, its completely free!
NTFS

8. Natural Keyboard on Mac http://david.rothlis.net/keyboards/microsoft_natural_osx/
I am used to the Natural keyboard, and found typing on a mac keyboard is not the most comfortable experience. Blog linked above walks through the steps of setting up the Microsoft Natural Keyboard on a mac.
keyboard

If you are trying to setup your mac to be more user friendly hopefully this post helped. Please feel free to post about any tools you may find helpful to you in the comments section.

Thats it for today.

Hola NodeJS, chat client using socket io

It was about time to play with NodeJS. It definitely WOW’ed me interms of performance and simplicity. Today I am going to share my experience building a chat client using NodeJS. This is one of the famous “Hello World” type application demo’ed.
If you haven’t already, you can setup node js by following the steps outlined on their website.

Creating simple http server
Let me demonstrate how easy it is to create a simple http server with node.
Create a js file and name it “server.js” and put the contents below:

var http = require('http');
http.createServer(function (req, res) {
  res.writeHead(200, {'Content-Type': 'text/plain'}); + '\n'
  res.end('Hello World\n');
}).listen(8080, '127.0.0.1');
console.log('Server running at http://127.0.0.1:8080/');

What we are doing above is that, we are requiring http module and listening on port 8080.
When a request comes, we are responding with the famous “Hello World” text.

To start the server simply run the following command:

$ node server.js

Now on your browser, navigate to “http://localhost:8080 ” , walla.. “Hello World”! (Note: you can go to any url on that port will respond back with same response, like http://localhost:8080/foo/bar will still resolve to same response.)

“npm” – Node Packaged Modules
Node comes with a really nice package manager called npm. If you are familier with package managers such as apt-get, yum, brew etc, you will find it right at home.

To install any package just type “npm install ”
For instance, to install “socket.io” module we would run the following:

  $   npm install socket.io

This will create a directory named “node_modules” and the requested module is pulled in there.
Alright, now we have enough arsenal to get started with the our topic.

Let’s Chat, shall we?
To start, lets create a directory so we can put our resources in there. Lets name it “NodeChat”.
Inside the directory let’s create a file with name, ‘server.js’. We will edit this in a bit.
On the command line run the following commands to install modules required by our program.

$ npm install socket.io
$ npm install node-static

socket.io is used for the websocket communication we will have between server and the browser.
node-static will let us serve static files via nodejs.

Now we have that lets hack-away our server.js.
To start lets say that we will just “post message” to the server and server will broadcast it to all the clients.

To start, let’s build a web server component. As we did in above example we will do the following:

var app = require('http').createServer(handler),
io = require ('socket.io').listen(app),
static = require('node-static');

Here we are building a web server. The “handler” is a function I will show in a bit. The “socket.io” will listen on the http server we just created.

Now, we can add the following:

// Make all the files in the current directory accessible
var fileServer = new static.Server('./');

app.listen(8080);

That piece is self explanatory. Now to the important piece, we will add the handler and the socket.io stuff.
Below is the complete contents of the file when we will be done.

//Node.js Chat client Server

var app = require('http').createServer(handler),
io = require ('socket.io').listen(app),
static = require('node-static');

// Make all the files in the current directory accessible
var fileServer = new static.Server('./');

app.listen(8080);

function handler(request, response) {
	request.addListener('end', function () {
		fileServer.serve(request, response);
	});
}

io.sockets.on('connection', function(socket) {
	socket.on('postMessage', function(data){
		socket.broadcast.emit('message', data);
		socket.emit('message', data);
	});
});

Here, the function handler is simply delegating to serve the static content requested.
Important part is the io.sockets piece. When a client fires the ‘postMessage’ event, we will run the closure attached to the event on the server. In this case, we simply trigger the ‘message’ event along with the data on all the active clients except for the socket that trigged it. To echo the message back, we trigger the ‘message’ event on the socket itself with the data.

Now we have the backend ready lets work on the Front-end.

Create “index.html” and paste the following html code.

<!DOCTYPE HTML>
<html>
<head>
	<title>Live Chat Powered by Node.js</title>
	<script src="/socket.io/socket.io.js"></script>
	<script src="//ajax.googleapis.com/ajax/libs/jquery/1.9.1/jquery.min.js"></script>
	<script>
	$(document).ready(function () {
		var socket = io.connect('http://localhost:8080');

    	//Bind the "send" button to do a post
    	$("#send-btn").bind('click', function() {
    		socket.emit('postMessage', {text: $("#message-box").val()});
    		$("#message-box").val('');
    	});

    	//on socket message from server
    	socket.on('message', function(data) {
    		$("#message-board").append( data.text + "<br/>");
    	});

    });
	</script>
	<style>
	#message-board {
		width: 500px;
		height: 400px;
	}
	</style>
</head>
<body>
	<div id="content">
		<div id="message-board"></div>
		<input id="message-box" type="text" size="100" placeholder="Type a message..."/>
		<button id="send-btn">send</button>
	</div>
</body>
</html>

Here we have simple page with one text box and one button.
Using jQuery, when the page is loaded, we create a socket connection to the server.
When ‘click’ event is fired, we fire the ‘postMessage’ event with the text value from the ‘message-box’ input. and we clear the box for user to type new message.
When the server fires the ‘message’ event on our local client script will simply append the text on the “message-board” div.
Here you go we have a very simple Chat client.

I have added some flare to it, you can find the code at https://github.com/manijshrestha/NodeChat

Setting up VIM with better color scheme while working via dark console.

I spend a lot of time working in the console window as I manage multiple EC2 instances.
At work I use cygwin and at home I use gold old linux terminal. Depending on the configuration, vim color scheme might not be as terminal color friendly.
Look at the image below.
vim1

I could hardly read the comments on this shell script. Luckily vim does provides multiple color schemes to work with.
You can try different color scheme by running “:colorscheme” in vim.

:colorscheme delek

Instead of doing it every time, We can manage the default vim setting by creating a “.vimrc” file on the home directory.
Lets do that:

$ vi ~/.vimrc

Add following lines in the file


syntax on
colorscheme delek

I have selected have the syntax highlighting on and selected “delek” color scheme so its easier to read on my terminal.

vimrc

Now lets look at the same shell script:

vim2

And the output is much readable on the dark console.

You can select other color scheme depending on your preference. You can find the installed schemes at

/usr/share/vim/vim72/colors

Some of the default ones you may find are

blue.vim
darkblue.vim
default.vim
delek.vim
desert.vim
elflord.vim
evening.vim
koehler.vim
morning.vim
murphy.vim
pablo.vim
peachpuff.vim
README.txt
ron.vim
shine.vim
slate.vim
torte.vim
zellner.vim

You can download more online http://www.vimninjas.com/2012/08/26/10-vim-color-schemes-you-need-to-own/.